

A few months ago a good friend of mine dropped me a facebook message asking if I'd be able to make a labcoat for his girlfriend's teddy bear as a birthday present. . . I thought, "yea, why not! there must be loads of tutorials on the Internet for stuff like that..." ... well guess what... there isn't :-/ ...
Well there is now!!
Teddy Bear Labcoat Tutorial!!
This pattern should fit teddys of these proportions.
Some modification might me needed for smaller/larger teddies!
arm circumference 12 cm
neck 26 cmunder arm circumference 28 cm
waist 34 cm
neck to foot 22 cm
neck to top of leg 14 cm
arm length 12.5 cm
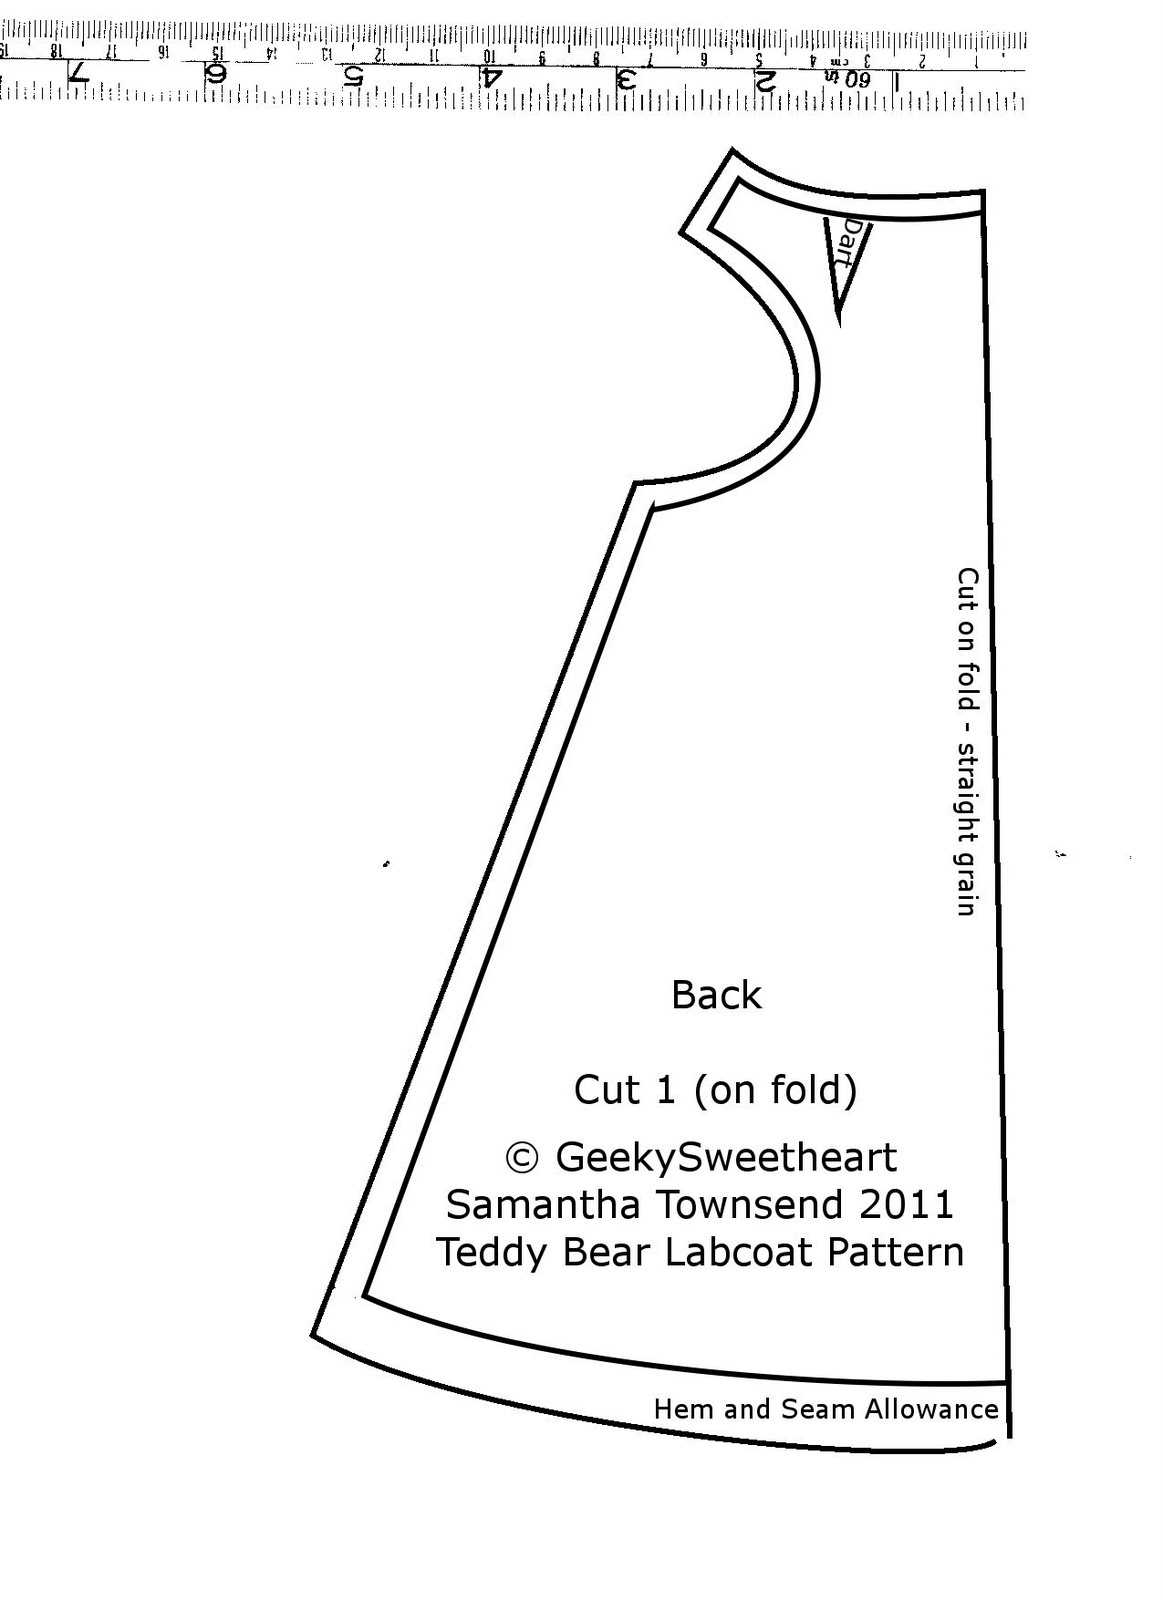
Pattern Pieces: right click and "Save Target as"/"Save image as"
I haven't figured out the whole PDF thing yet, so I've included a tape measure on each one so you can be sure you've got the sizes right for printing.
 |  |  |
I forgot to do a pattern piece for the pocket :-( sorry... you can figure it out!


When you've got the collar constructed, you need to put the 2 together, sew the edges right sides facing (I handstitched, but if you feel confident enough to machine stitch that would be better.)
Then turn right side out and press to create your collar.

This picture shows how the body pieces go together, but don't forget to sew your darts first!

You then want to sew your sleeves to the armholes (remember, right sides facing). The 'correct' garment construction is open to debate here, but what I always do is sew the curved part of the sleeve to the armhole first, then sew right from the cuff, past the armpit, town to the bottom hem. You should have no problem doing this with a machine (I did it with a short zigzag stitch to catch any fraying edges.)
hm.. for some reason I stopped taking pictures here (that must mean I was getting really excited!)
Sew the collar to the neckline, I decided to have the seam inside the garment since this is a tricky one (really too small to attach the collar 'properly' but if you want to have a go be my guest. so I had the Right side of the garment facing the underside of the collar.... hope that makes sense.
Finish Cuffs/Hems and fastenings. Probably best if you try your labcoat on your teddy to check. I used little plastic press studs which I handsewed on after I'd hemmed the front of the coat.

Make your Patch Pocket - yeyy photos... I clearly knew this would be really hard to explain.. ok so draw your pocket shape BIGGER than you want your pocket to be on a piece of cardboard.
Look at the image below, the cardboard shape is what I used for my pattern, but the marking in pencil is how big my pocket is going to be.

Ok so then trim the card down to the pencil lines and use it as a guide to press the edges of your pocket inwards... like this...


See? a pocket! .... pin it where you want it and stitch it in place.. again I handstitched...

Then I get a little carried away and drew some markings onto a scrap piece of cardboard to make a ruler...


DONE!!
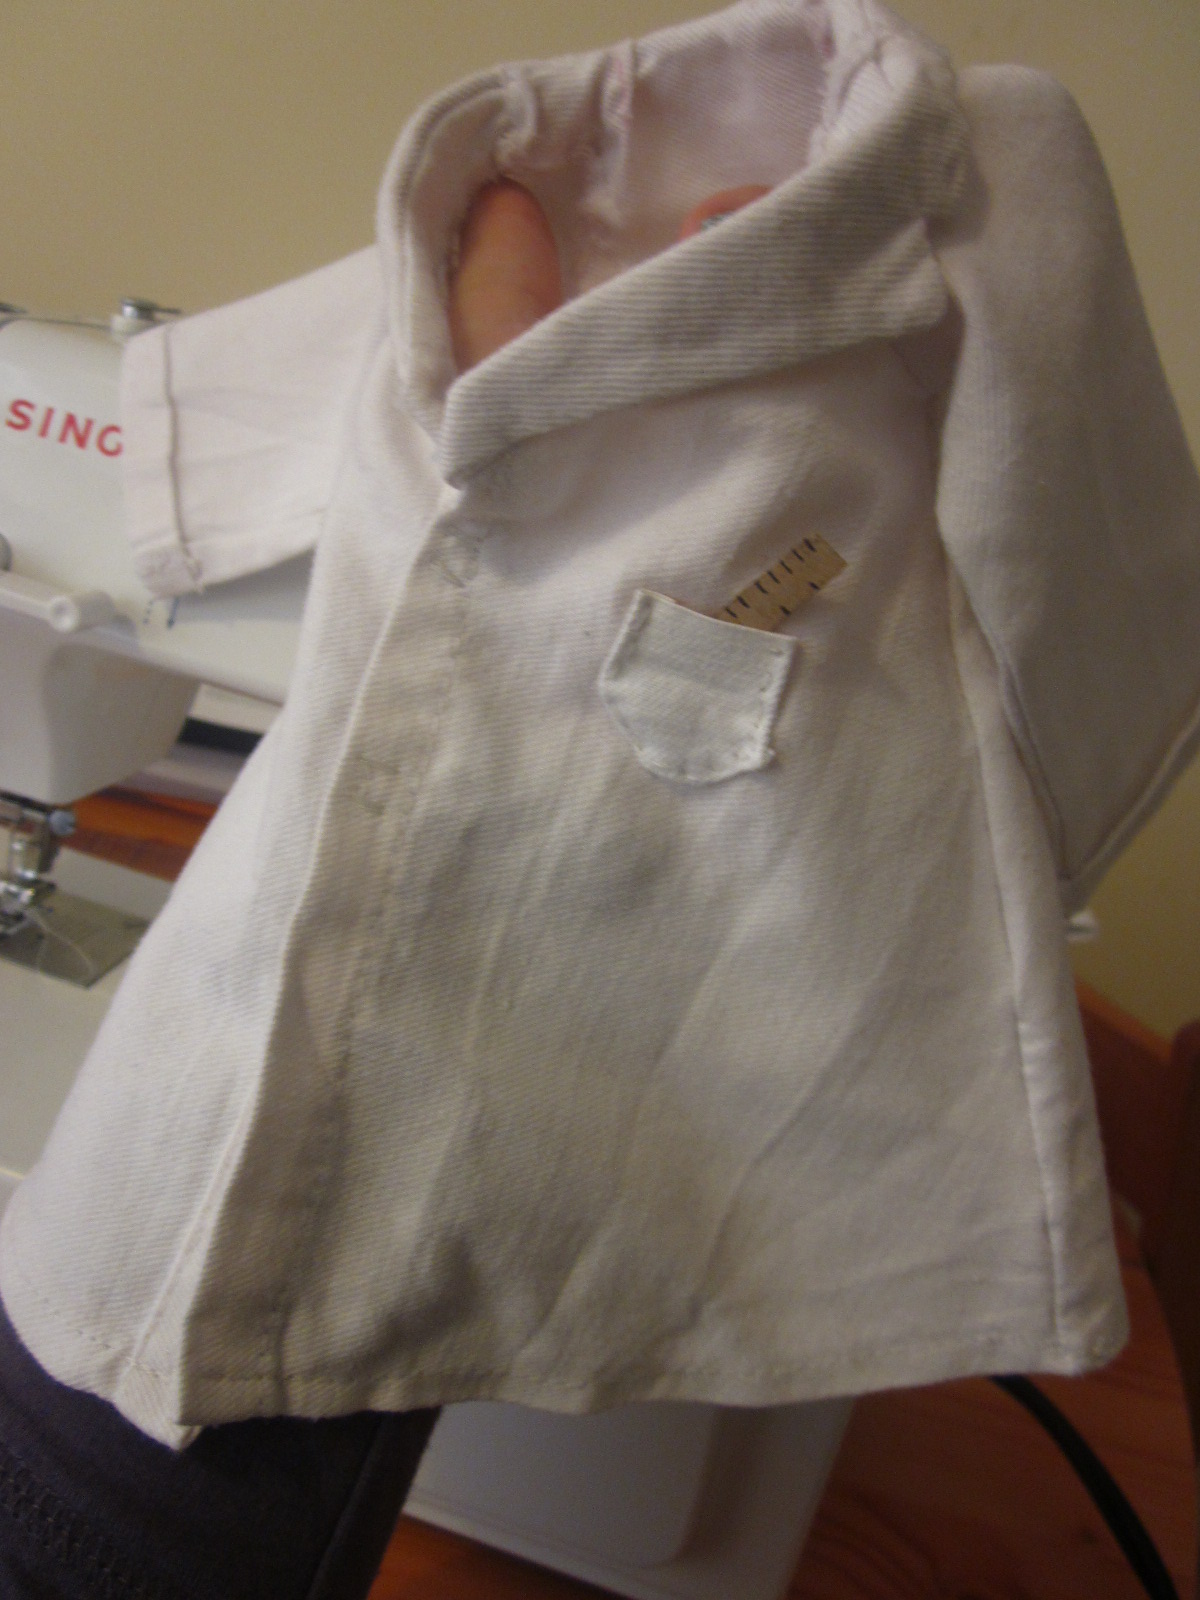
I use iron on inkjet transfer paper to label things that I've made :-)


and PLEASE please PLEEEEAASSSEEE let me know if you make one for yourself :-) I'd love to see what you did :-)
I found your pattern after finding myself in the same situation - "Sure, I can make a lab coat for a teddy bear for your teddy bear auction. The interweb is full of patterns for just this sort of thing." WRONG!
ReplyDeleteI am in the process of piecing it together, but will link a photo when I'm done. Thanks so much for creating this off the top of your incredibly talented head.
@e l a n a
ReplyDeleteFANTASTIC, keep me posted, let me know if you need anything x
Excellent! Going to give this a bash for the science themed sock monkey I am making for my son using these socks from Sock it to me http://www.sockittome.com/cart/index.php?dispatch=products.view&product_id=30034 will let you know how it goes when I am done!
ReplyDeleteAwesome! Thanks so much :)
ReplyDeleteThank you!! :D
ReplyDeleteYou are a lifesaver. Searched for days for this.
ReplyDeleteI'm making a Doctor puppet and this was the final piece.
Thank you
Thank you thank you thank you! I'm making a Joker doll (Heath Ledger) in the nurse outfit and you have saved me!I'll be able to make this look like a dress. X
ReplyDelete